Follow Me On Social Media!
Chocolate Mint Bars: The Ultimate Indulgent Dessert Delight
Introduction to Chocolate Mint Bars
Chocolate mint bars are not just a dessert; they’re an experience that can transport you back to simpler times, perhaps to a nostalgic moment of sharing sweets after school or celebrating a friend’s birthday. Imagine the delightful combination of rich chocolate and invigorating mint, coming together in perfect harmony to create not just treats, but memories. Whether you’re hosting a gathering, indulging in a quiet evening at home, or looking for a sweet gift for a loved one, these bars are sure to impress with their irresistible flavor and beautiful presentation.
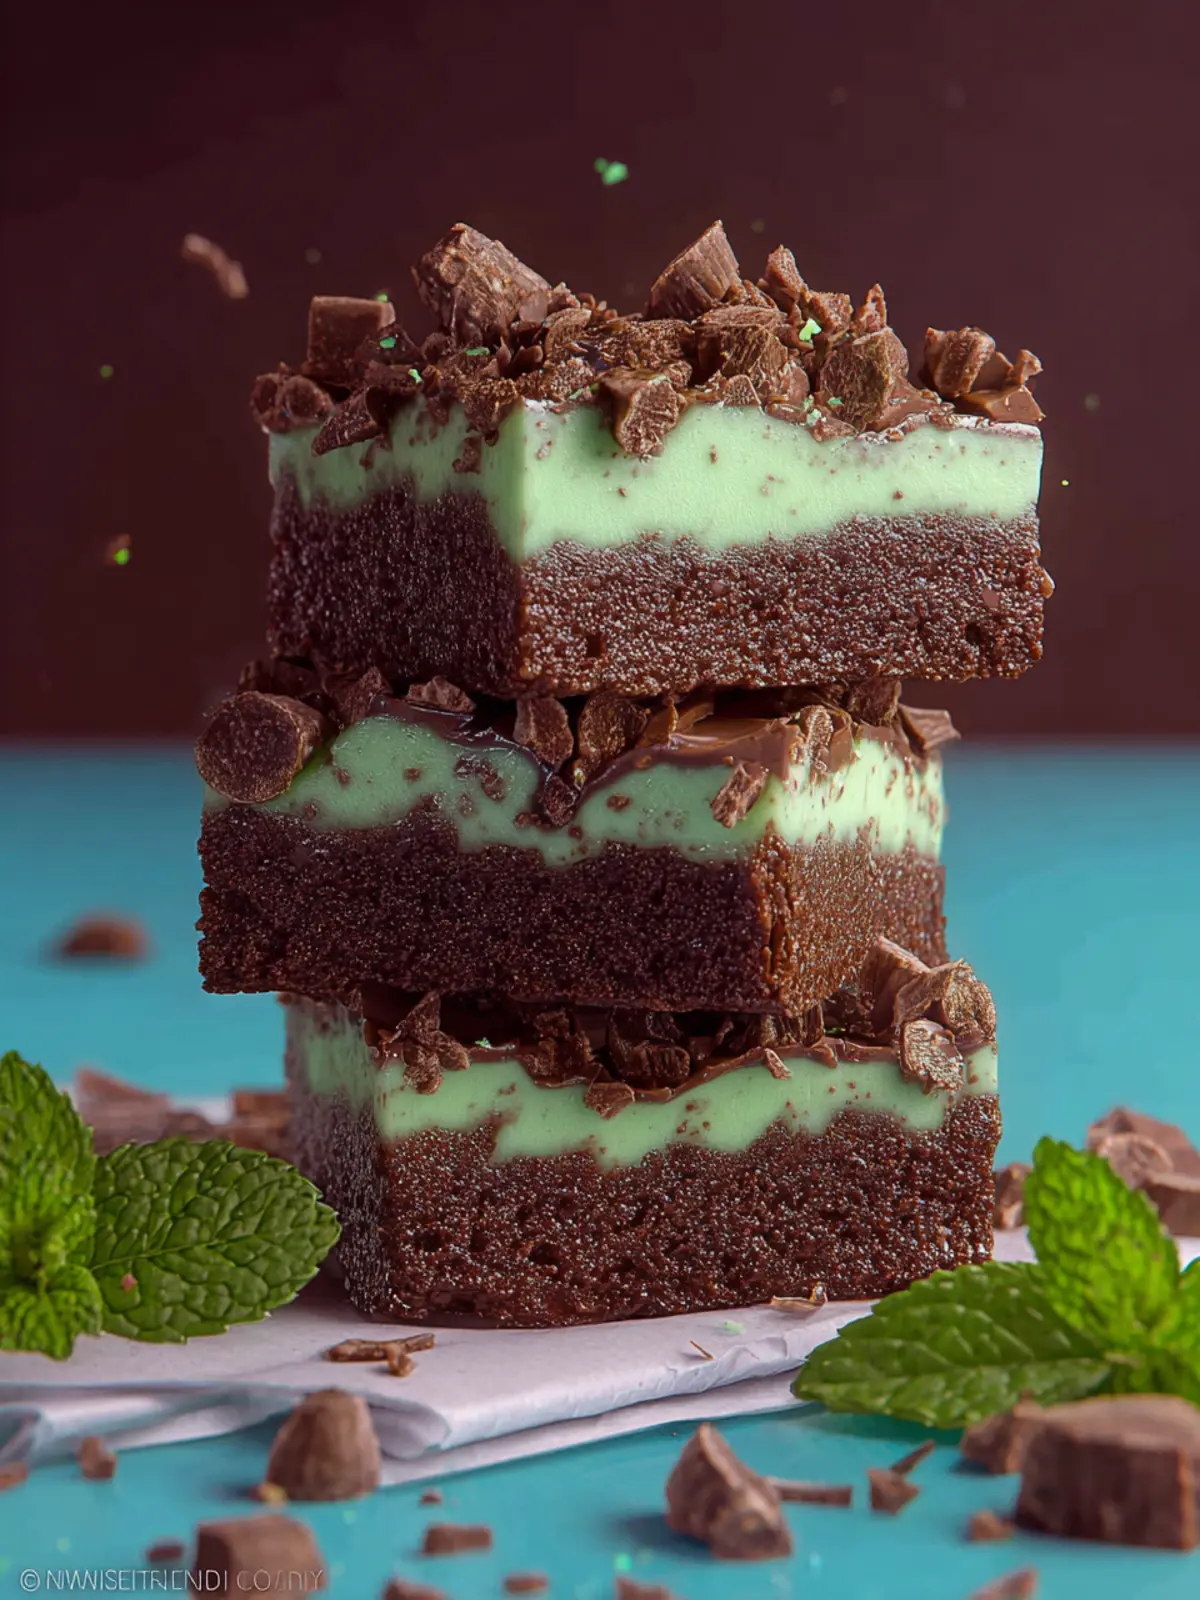
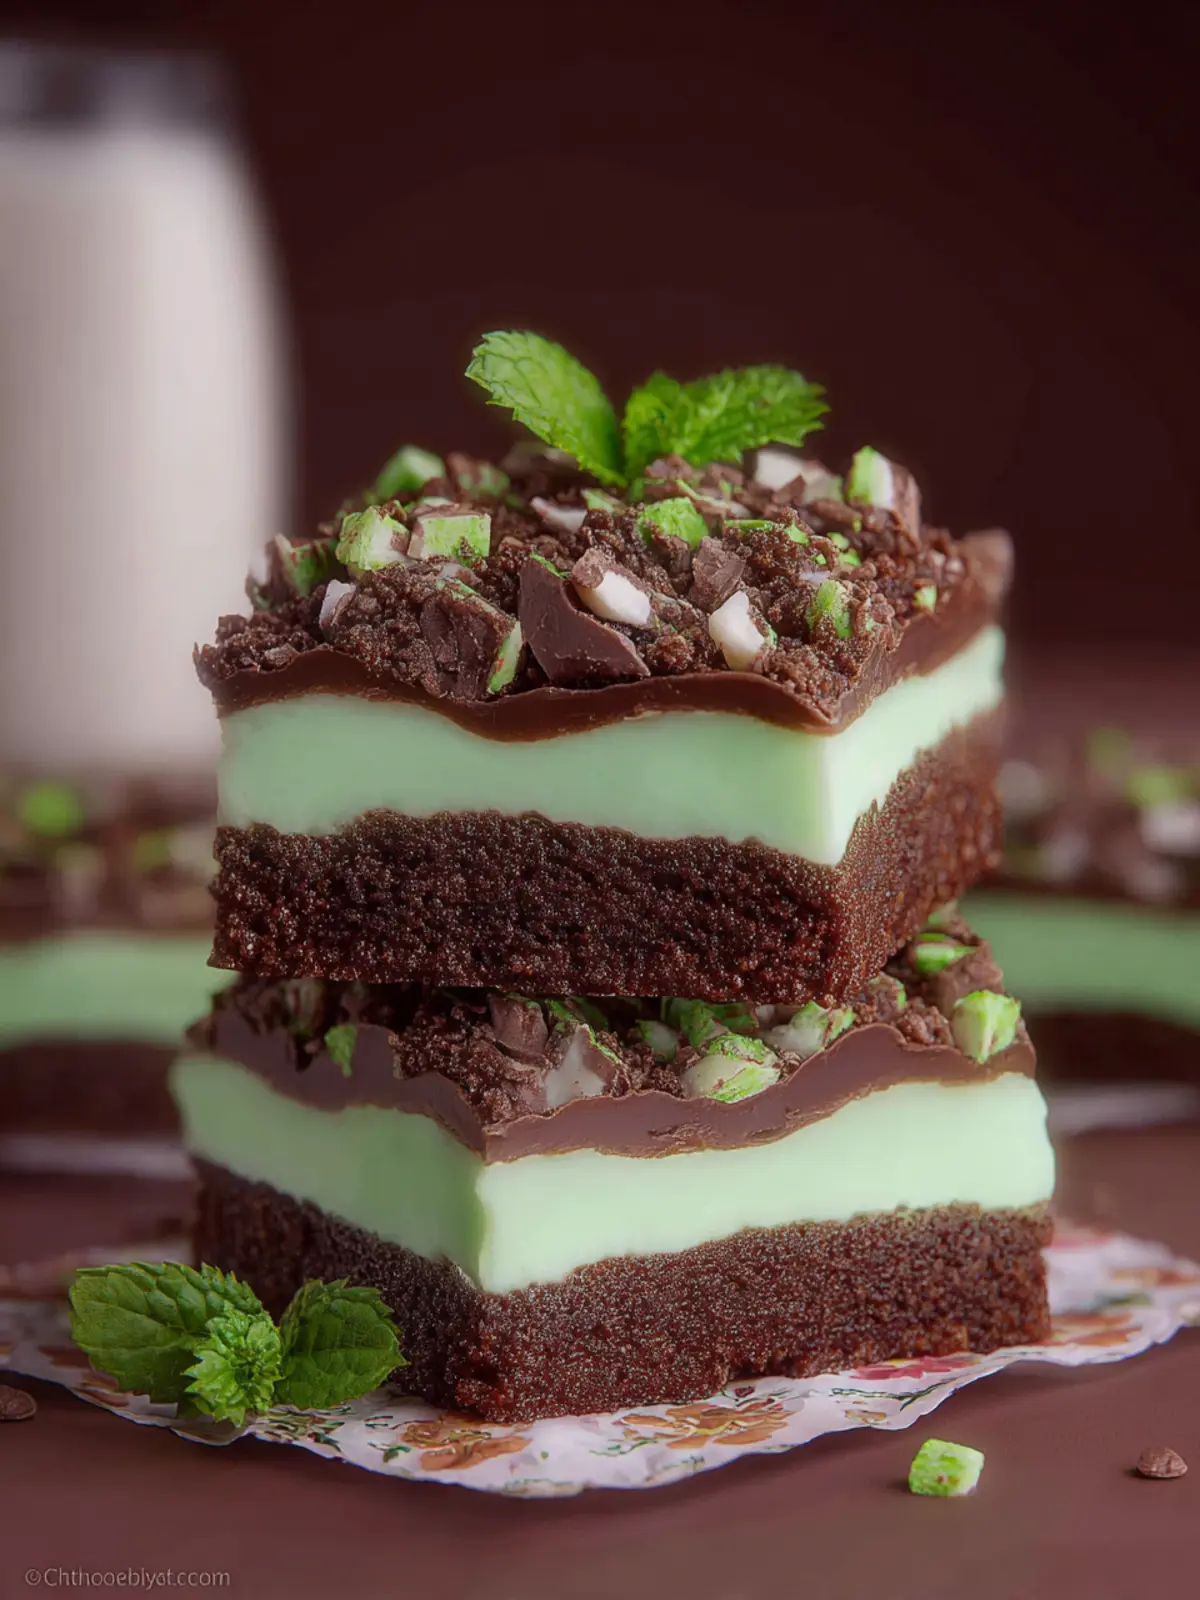
These chocolate mint bars are characterized by their luscious layers that each play a crucial role. The bottom layer is a decadent chocolate crust that lays the foundation for the creamy filling above. This filling is a delightful blend of minty freshness and smoothness that dances on your palate. Topped with a layer of rich chocolate, each bite delivers an exquisite balance of sweetness and cool mint flavor that can brighten even the dullest of days.
You might be wondering, what makes chocolate mint bars a go-to dessert?
What makes Chocolate Mint Bars a go-to dessert?
- Versatility: These bars shine in any setting. They can be served at a casual barbecue, a formal dinner party, or even as a midday treat during busy workdays.
- Ease of Preparation: In just a few simple steps, you can whip up a batch that is sure to impress. No complicated techniques are required; this recipe allows you to enjoy the process of baking without feeling overwhelmed.
- Crowd-Pleasing Flavor: The beloved combination of chocolate and mint is not just for holiday treats; it resonates well throughout the year. The chocolate provides richness, while the mint adds a refreshing twist that complements any occasion.
- Eye-Catching Presentation: With their delightful layers and shiny chocolate top, these bars are as pleasing to the eyes as they are to the taste buds, making them perfect for sharing or simply enjoying yourself.
So, whether it’s a special occasion or just a regular day that needs a little pick-me-up, chocolate mint bars have got you covered. Let’s dive into the recipe that promises to be both fun and fulfilling, bringing joy to your kitchen and to those you share it with!
Key Ingredients for Chocolate Mint Bars
Butter: The foundation of these chocolate mint bars lies in the use of unsalted butter. It not only creates a rich, tender base but also allows for precise control over the flavors. Using unsalted butter ensures that your bars aren’t too salty, allowing the chocolate and mint to shine through beautifully.
Sugars: To achieve the perfect balance in sweetness, I combine brown sugar and granulated sugar. The brown sugar adds a layer of depth and moisture, while the granulated sugar provides that delightful crunch and sweetness, making each bite utterly satisfying.
Cocoa Powder: For chocolate lovers, dark cocoa powder is a must. Its intense chocolate flavor elevates these bars, turning them into a decadent treat that’s hard to resist.
Flour: All-purpose flour serves an essential role by providing structure to the chocolate mint bars. It keeps the bars soft and chewy, which is exactly the texture we’re aiming for.
Egg: Just one egg works wonders; it binds all the ingredients together and ensures that your bars maintain their shape once baked.
Mint Extract and Andes Mint Bars: The addition of mint extract and chopped Andes Mint Bars brings that beloved minty freshness. This classic pairing of mint and chocolate is what truly makes these bars stand out.
Why You’ll Love These Chocolate Mint Bars
Picture this: you take a bite of a chocolate mint bar and instantly find yourself in a delightful whirlwind of flavors. The rich chocolate melds seamlessly with that refreshing hint of mint, making it the perfect indulgence for any time of the day. Whether you’re enjoying them as a midday treat or a post-dinner delight, these bars transport your taste buds to a new realm of deliciousness.
A Perfect Balance of Flavors
One of the best parts about these chocolate mint bars is their incredible flavor balance. The deep, fudgy chocolate base provides a decadent foundation, while the mint layer adds a refreshing crispness that keeps each bite interesting. It’s a sweet harmony that’s hard to resist!
Simple Ingredients, Stunning Results
You don’t need a long list of fancy ingredients to create a dessert that impresses. With staples like chocolate, butter, and mint extract, you can whip up these bars with ease. The simplicity of the recipe means you can make them for snack time or a last-minute gathering without stress.
Customizable for Every Occasion
Feeling adventurous? You can easily switch up the flavor profile by experimenting with different types of chocolate or adding nuts for an extra crunch. The potential to personalize these chocolate mint bars makes them an ideal treat for any occasion.
In short, once you try these bars, they will undoubtedly become a cherished part of your baking repertoire!
Variations on Chocolate Mint Bars
Exploring chocolate mint bars is like discovering new facets of a favorite gemstone; each twist on the classic brings its own shine and flavor. If you’re ready to take these bars to the next level, here are some delightful variations that can cater to any palate or occasion.
Adding a Nutty Twist
Incorporate finely chopped nuts like walnuts or almonds into the chocolate layer for a satisfying crunch. This not only enhances the texture but also complements the creamy mint with nutty undertones.
Flavor Infusions
Experiment with other flavor extracts such as orange or almond to elevate your mint experience. A few drops in the mint layer can add an unexpected zing that will delight your taste buds!
Swap the Base
Try replacing the traditional graham cracker crust with crushed Oreo cookies. The rich chocolate cookie base paired with mint is a divine match, making for a deliciously indulgent treat.
Enhance with Toppings
Top your finished chocolate mint bars with shaved chocolate, drizzles of caramel, or a sprinkle of sea salt. These additions can create a more sophisticated dessert that is both visually appealing and delicious.
Dairy-Free Version
For a dairy-free option, substitute coconut milk in the chocolate layer and use dairy-free chocolate chips. This way, everyone can enjoy the luxurious taste of chocolate mint without compromising on flavor.
These variations not only keep the classic recipe fresh but also invite creativity in the kitchen, giving you the freedom to make chocolate mint bars your own.
Tips for Making Perfect Chocolate Mint Bars
Creating chocolate mint bars is like crafting a sweet love letter to your taste buds. While the recipe itself is straightforward, a few tips can elevate your bars from good to absolutely irresistible.
Use High-Quality Chocolate
When it comes to making chocolate layers, the choice of chocolate matters. Opt for high-quality dark chocolate with at least 60% cocoa content for a rich flavor. This will really contrast beautifully with the refreshing mint layer.
Don’t Rush the Cooling Process
Patience pays off! After baking the crust, it’s crucial to allow it to cool completely before adding the chocolate layer. This prevents the layers from melding together, ensuring their distinct flavors shine through.
Fresh Mint vs. Extract
If you’re a mint aficionado, consider using fresh mint leaves for your mint layer. They provide a vibrant, natural flavor that can’t be replicated with extract. If you use extract, start with a small amount and adjust to taste — it can be quite potent!
Properly Set Your Bars
Once assembled, let your chocolate mint bars chill in the refrigerator for at least two hours. This helps them set properly, making them easier to cut into uniform squares.
A Touch of Sea Salt
Adding a sprinkle of flaky sea salt on top before slicing can enhance the flavors, creating a delightful contrast to the sweetness. It’s a simple step that makes a world of difference!
By following these tips, you’ll master the art of making delightful chocolate mint bars that everyone will love!
Serving Suggestions for Chocolate Mint Bars
The irresistible allure of chocolate mint bars makes them a versatile treat, perfect for a variety of occasions. Imagine sharing these delightful squares at gatherings, bringing joy to friends and family with their vibrant flavor and luxurious texture.
Pairing Accents
- Coffee or Espresso: The rich flavor of coffee complements the coolness of mint perfectly. A strong brew enhances the chocolate without overpowering its sweetness.
- Fresh Berries: A side of raspberries or strawberries adds a refreshing element, balancing the richness with their natural tartness. Plus, their color looks stunning on a dessert platter!
- Whipped Cream: A dollop of freshly whipped cream can elevate your chocolate mint bars, bringing an airy texture that contrasts beautifully with the dense bar.
Gourmet Presentation
- Drizzle with Chocolate Sauce: For an upscale presentation, drizzle warm chocolate sauce over the bars before serving. This extra touch not only looks fantastic but satisfies any additional chocolate cravings.
- Mint Leaves Garnish: A sprig of fresh mint on each bar adds a pop of color and reinforces the minty flavor, making your dessert even more enticing.
Remember, the way you serve your chocolate mint bars can transform them into a show-stopping dessert, perfect for celebrations or a cozy night in. Enjoy experimenting with these suggestions!
Time Breakdown for Chocolate Mint Bars
Creating the perfect chocolate mint bars is not just about the delicious end product; it’s also about the joyful journey through preparation and baking. Here’s how your time will be spent in this delightful process:
Preparation Time
Before you dive into baking, you’ll want to allocate approximately 20 minutes for preparation. This is when you gather your ingredients, mix the cookie base, and prepare the minty filling. It’s a great time to put on some music and make the kitchen your creative space.
Baking Time
Once your mixture is ready, it’s baking time! Expect to have the bars in the oven for about 25 minutes. During this time, your kitchen will fill with the comforting aroma of chocolate and mint—a wonderful prelude to what’s coming.
Cooling Time
After baking, patience is key. Allow your chocolate mint bars to cool for at least 30 minutes. This step is essential for setting the mint layer, ensuring that each bite is as satisfying and tasty as possible.
Total Time
In total, you’re looking at roughly 1 hour and 15 minutes from start to finish. This includes prep, baking, and cooling. It might seem like a wait, but trust me, this delicious treat will be well worth it!
Nutritional Facts for Chocolate Mint Bars
Creating chocolate mint bars can be both a delightful and guilt-free experience when you’re knowledgeable about their nutritional content. Here’s a brief look at what makes up these delicious treats:
Calories
Each serving of these chocolate mint bars contains approximately 200 calories, making them a satisfying yet mindful indulgence.
Carbohydrates
With about 26 grams of carbohydrates per serving, these bars offer just the right balance of sweetness to keep your cravings at bay while still providing energy.
Fat
At around 10 grams of fat per bar, the rich chocolate and creamy mint provide a delectable flavor without overwhelming your daily fat intake.
Now that you have a clearer idea of the nutritional facts, you can enjoy your chocolate mint bars even more, knowing what they bring to the table!
FAQs about Chocolate Mint Bars
How can I make these bars gluten-free?
If you’re aiming for gluten-free chocolate mint bars, swapping out traditional flour for a gluten-free all-purpose flour blend is your best bet. Look for a blend that contains xanthan gum, which helps mimic the structure provided by gluten. This small change doesn’t compromise flavor or texture, so those with gluten sensitivities can indulge just as easily as everyone else!
Can I store Chocolate Mint Bars in the freezer?
Absolutely! Freezing your chocolate mint bars is a fantastic way to prolong their life. Wrap individual bars tightly in plastic wrap or place them in an airtight container. When you’re ready to enjoy one, simply let it thaw at room temperature for about 30 minutes. You’ll find that they maintain their delicious taste and texture, making them a perfect treat on a busy day.
What’s the best way to cut these bars?
For perfectly cut chocolate mint bars, I recommend chilling them in the refrigerator for at least an hour after baking. Once they’ve set, use a sharp knife to make clean cuts. For even more uniformity, run the knife under hot water before slicing. Wipe it dry between cuts to prevent the chocolate from smudging. This ensures you achieve those delightful, neat squares or rectangles that are not only visually appealing but also irresistible.
Feel free to explore these questions as you dive into your chocolate mint bars journey, and enjoy every delectable bite along the way!
Conclusion on Chocolate Mint Bars
In the world of dessert, chocolate mint bars certainly hold a special place. They perfectly balance the rich sweetness of chocolate with the refreshing hint of mint, making for a delectable treat that’s hard to resist. Whether you’re baking for a special occasion or simply indulging yourself after a long day, these bars will always bring a touch of joy.
The versatility of this recipe allows for creative variations, and you might even find yourself inventing new flavor combinations. So, gather your ingredients, share them with friends, and enjoy every bite of these delightful bars. Your taste buds will thank you!
Print
Andes Mint Brownies
- Total Time: 25 minutes
- Yield: 12 servings 1x
- Diet: Vegetarian
Description
Delicious chocolate brownies topped with a creamy Andes mint frosting.
Ingredients
Scale
- 1/2 cup unsalted butter, softened
- 1/2 cup packed brown sugar
- 1/2 cup granulated sugar
- 1 large egg
- 2 teaspoons vanilla extract
- 2 tablespoons milk
- 2 cups all purpose flour (240g)
- 1/2 cup dark cocoa powder
- 1 teaspoon baking powder
- 1/2 teaspoon table salt
- 1/2 cup unsalted butter, softened
- 1/4 teaspoon mint extract
- 1/4 teaspoon vanilla extract
- 6 tablespoons heavy whipping cream
- 1/4 teaspoon salt
- 4 cups powdered sugar
- green gel food coloring
- 1 cup chopped Andes Mint bars
Instructions
- Preheat the oven to 375°F. Spray a 9×13 pan with non-stick baking spray.
- Beat the butter and sugar together. Add the egg, vanilla, and milk, and beat again.
- Stir together the flour, cocoa powder, baking powder, and salt. Slowly add to the butter mixture until everything is mixed in. Press the mixture into the prepared 9×13 pan. Bake for 14-15 minutes. Let cool completely.
- Beat the butter, extracts, and whipping cream until creamy. Slowly add the salt and powdered sugar until fully mixed.
- Add a little bit of green food coloring for a touch of color. Beat for another minute until creamy.
- Spread over the cooled bars, then top with the chopped Andes Mint. Store in a sealed container on the counter.
Notes
- Store leftovers in an airtight container.
- Prep Time: 10 minutes
- Cook Time: 15 minutes
- Category: Dessert
- Method: Baking
- Cuisine: American
Nutrition
- Serving Size: 1 brownie
- Calories: 250
- Sugar: 22g
- Sodium: 200mg
- Fat: 12g
- Saturated Fat: 7g
- Unsaturated Fat: 3g
- Trans Fat: 0g
- Carbohydrates: 35g
- Fiber: 2g
- Protein: 3g
- Cholesterol: 30mg