Follow Me On Social Media!
No-Bake Granola Bars: Easy, Chewy Treats to Love
Introduction to No-Bake Granola Bars
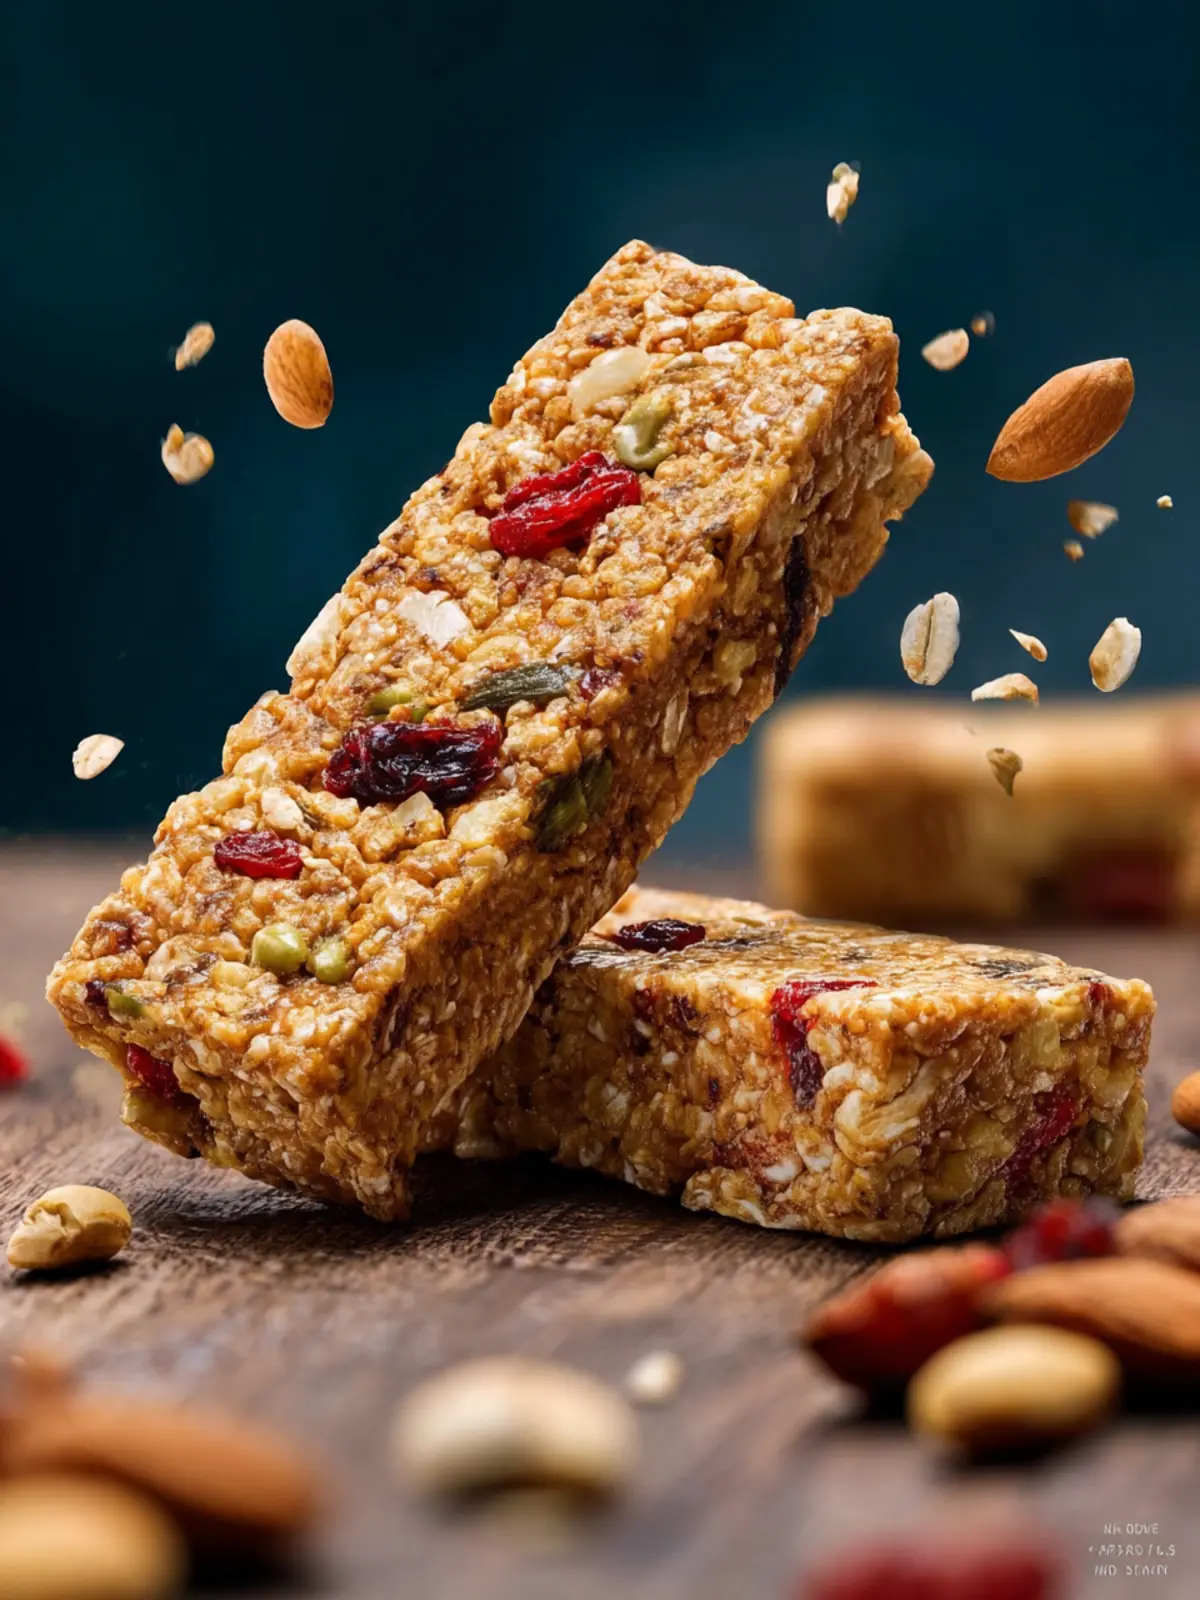
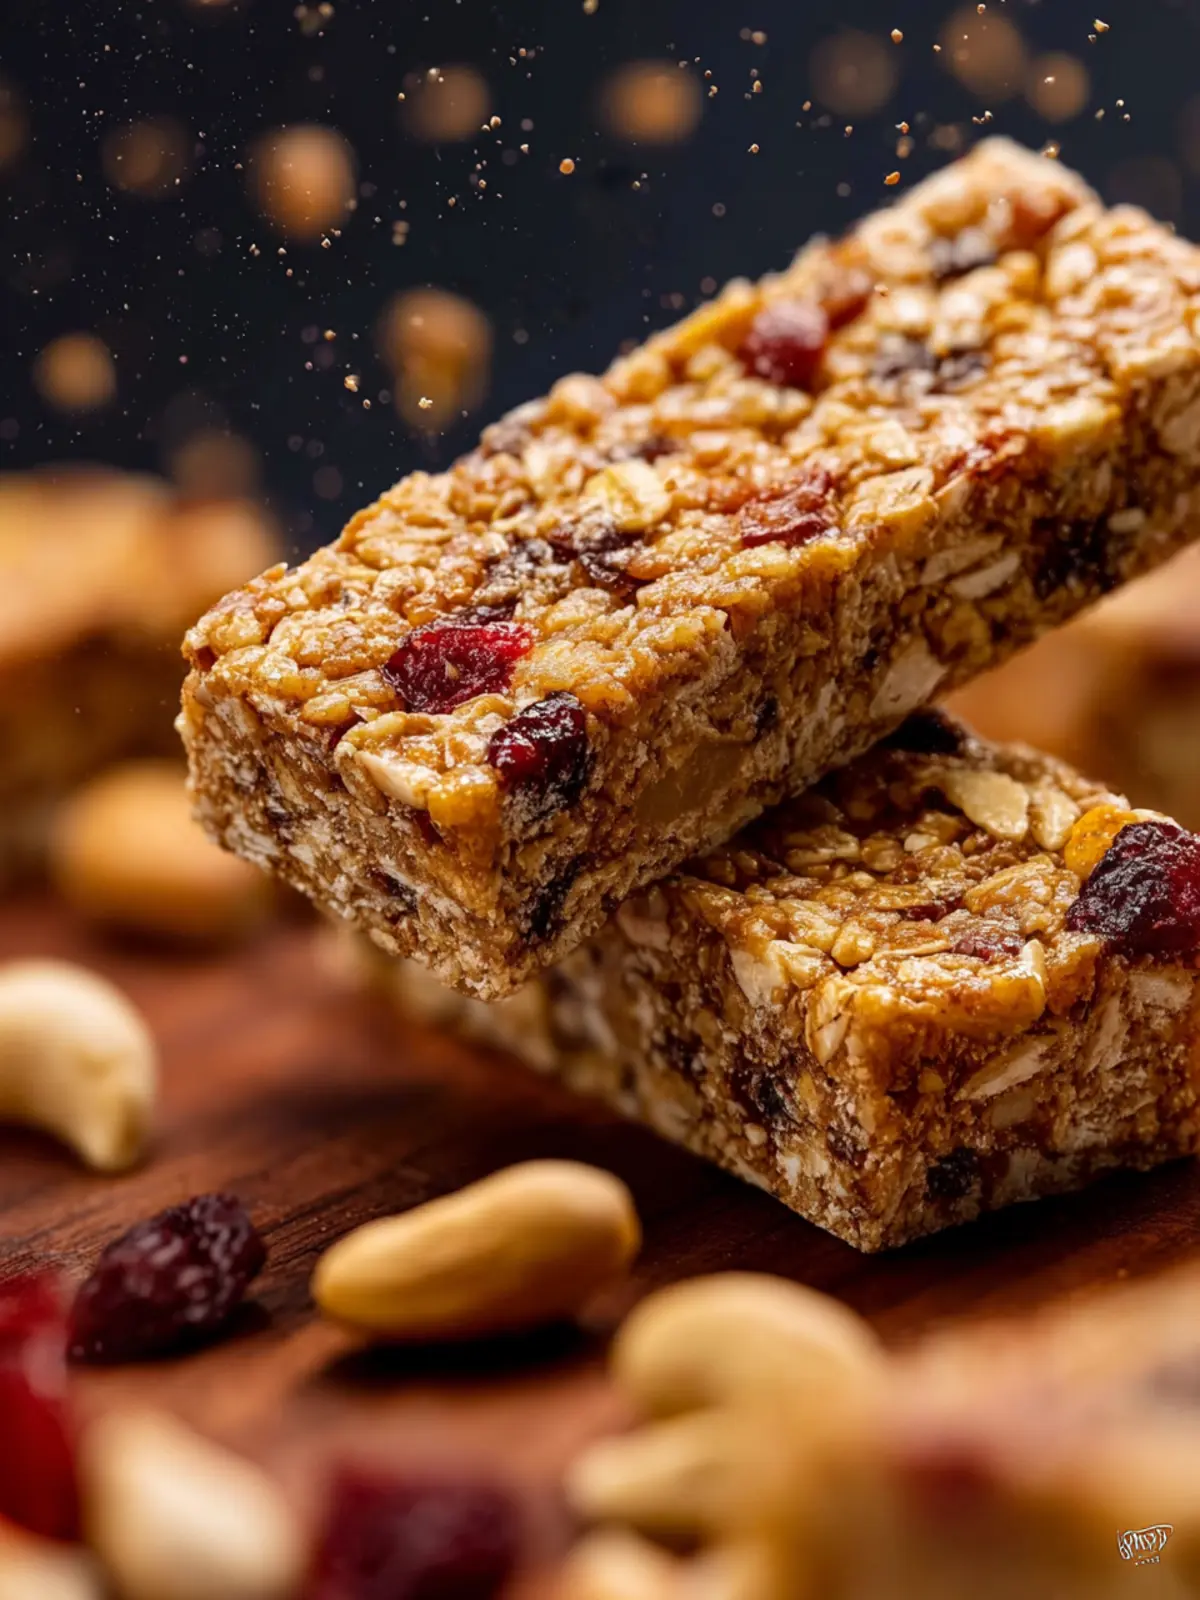
The world of no-bake granola bars offers a delightful escape from the hustle and bustle of cooking. Picture this: it’s a busy weekday morning, and you need a grab-and-go snack that is both nutritious and satisfying. That’s where homemade granola bars come into play! This simple recipe lets you whip up a batch of chewy, flavor-packed bars without ever needing to turn on the oven.
Creating your own no-bake granola bars is not just a trend; it’s a game-changer for numerous reasons. For one, you control the ingredients, which means you can adjust everything to meet your dietary preferences or restrictions. Want to avoid added sugars? Substitute with your favorite natural sweeteners. Craving a boost of protein? Toss in some nuts or seeds to enhance both the nutrition and the texture. The versatility is endless!
Additionally, homemade granola bars save you money. Store-bought varieties often come with a hefty price tag, not to mention preservatives and artificial ingredients that can undermine their health benefits. Think about it: a quick trip to the grocery store for a bag of granola bars can run you anywhere from $4 to $6. With this recipe, you can make several batches for a fraction of that cost, ensuring you always have a wholesome snack on hand.
Not to mention, making no-bake granola bars is a fun project that can involve friends or family. Imagine a weekend afternoon filled with laughter and creativity as everyone experiments with their favorite flavor combinations. You can have a little competition and see who can come up with the most unique bar!
In summary, the journey into the world of no-bake granola bars is an inviting one filled with opportunities for creativity and healthier choices. The best part? You can indulge in a delicious snack while feeling good about what you’re eating. So, let’s dive into the recipe and start crafting these tasty treats right in your kitchen!
Key Ingredients for No-Bake Granola Bars
Crafting no-bake granola bars at home is not just a cooking venture; it’s a delightful way to blend wholesome ingredients that fuel your day. Each ingredient plays a unique role, contributing to the flavor and texture that make these bars a go-to snack.
Oats: I often choose rolled oats for their hearty texture and nutty flavor. They act as the foundation for the bars, providing fiber and keeping you full longer.
Nut Butter: Smooth or crunchy, nut butters like almond or peanut add creaminess and healthy fats. They not only bind the ingredients together but also elevate the taste profile of the bars.
Sweetener: For sweetness, I prefer using honey or maple syrup. These natural sweeteners not only enhance flavor but also help the bars hold together perfectly.
Nuts and Seeds: A mix of chopped nuts and seeds adds crunch and boosts nutritional value. Think almonds, walnuts, or chia seeds for a protein punch.
Dried Fruit: Incorporating dried fruits like cranberries or apricots can provide a burst of sweetness that pairs beautifully with the other ingredients.
By combining these key ingredients, you’re not just making no-bake granola bars; you’re creating a delicious and nutritious snack that fits seamlessly into your busy lifestyle.
Why You’ll Love This Recipe
Creating no-bake granola bars is like discovering a hidden treasure in your own kitchen. Whether you’re rushing to meet a deadline at work or need a quick snack to fuel your yoga session, these bars are your go-to solution. They perfectly balance health and convenience, making them an ideal choice for busy young professionals like us.
Simplicity Meets Flavor
Using simple, wholesome ingredients, this recipe doesn’t require baking or complex techniques. You’ll be surprised at how quickly everything comes together! Have you ever craved a sweet treat that also gives you lasting energy? These granola bars deliver just that!
Customizable for Your Taste
Another delightful aspect is their versatility. Want to sneak in some chia seeds for added nutrition? Or maybe you’re a fan of dark chocolate chips? Customize each batch to fit your preferences and dietary needs. It’s like having a personalized snack right at your fingertips.
Perfect for Any Occasion
These no-bake granola bars are perfect for lunches, breakfast on-the-go, or even as a post-workout snack. They are not just easy to make; they also provide a delicious and healthy solution that your taste buds will rave about. Why not give them a try? You’ll love how satisfying they are!

Variations on No-Bake Granola Bars
Exploring different no-bake granola bars variations can turn your snack game into a fun, culinary adventure. Just imagine coming home after a long day at work and reaching for a wholesome treat that’s not only nutritious but also bursting with flavors tailored to your mood.
Nutty and Chewy
For those who love a little crunch, try adding various nuts to your bars. Chopped almonds, walnuts, or pecans can provide rich textures and healthy fats. Don’t hesitate to throw in some seeds, like chia or sunflower, for an added nutrient boost. The more, the merrier!
Fruity Bliss
Craving something sweet? Dried fruits can elevate your no-bake granola bars to new heights. Think raisins, cranberries, or even chopped apricots. Fresh fruit can also work; just ensure to balance the moisture levels to keep your bars from becoming too sticky.
Chocolate Indulgence
Who doesn’t love chocolate? Incorporate dark chocolate chips or cacao nibs for a decadent twist. Drizzling melted chocolate on top of your bars is another delightful option that combines nutrition with indulgence, leaving you feeling satisfied.
Spiced Delights
Want to mix things up? Experimenting with spices like cinnamon, nutmeg, or even a touch of ginger can transform your bars into cozy bites perfect for any season. A pinch of sea salt can enhance the sweetness and round out the flavors beautifully.
With these variations, your no-bake granola bars are sure to become a go-to snack for any occasion. Happy snacking!
Cooking Tips and Notes for No-Bake Granola Bars
Crafting no-bake granola bars can be a rewarding and simple kitchen adventure. Whether you’re planning a snack for a busy week, or just need a quick energy boost, these tips will help ensure your bars turn out perfect every time.
Choose Your Base Wisely
The foundation of your no-bake granola bars is critical. I prefer using old-fashioned rolled oats for their chewy texture and heartiness. Avoid instant oats, as they’ll yield a mushier product. Aim for a combination of crunch and chew by incorporating nuts or seeds, such as almonds or sunflower seeds, to elevate flavors and nutrients.
Binding Ingredients Matter
To hold everything together, a strong binding agent is key. I recommend using nut butter—like almond or peanut butter—as it adds flavor and richness. Honey or maple syrup works beautifully to keep the ingredients cohesive while adding a touch of sweetness. If you’re vegan, consider agave syrup to replace honey.
Chill for Best Results
Once you’ve mixed and pressed the ingredients into a pan, don’t skip the chilling step! Allow your no-bake granola bars to set in the refrigerator for at least an hour. This helps them firm up, making them easier to cut into perfect squares. I always keep a batch tucked away for snacking throughout the week!
By following these tips, you’ll enjoy a delicious homemade treat that fits right into your busy lifestyle. Happy cooking!

Serving Suggestions for No-Bake Granola Bars
Enjoying no-bake granola bars is all about finding the right moments to savor their delightful flavors and textures. These versatile treats can be a perfect companion during various activities. Here are a few serving suggestions that can elevate your snacking experience:
-
Breakfast Boost: Pair your no-bake granola bars with a dollop of Greek yogurt and fresh fruit. This combination not only enhances the nutritional value but also offers a refreshing start to your day.
-
Afternoon Snack: Craving something crunchy? Slice the bars into bite-sized squares and enjoy them with a warm cup of herbal tea. The contrast of flavors and textures will keep your energy up as you power through the workday.
-
On-the-Go Treat: Take a few bars with you on your next hike or busy day. They are the perfect portable snack that provides quick energy without any fuss.
-
Movie Night Indulgence: Crumble your no-bake granola bars over popcorn for a sweet and salty twist that adds extra texture to your movie night snack.
With these suggestions, your no-bake granola bars will always have a place on your table or in your bag!
Time Breakdown for No-Bake Granola Bars
Creating delicious no-bake granola bars is not just simple; it’s also quick! Let’s dive into how your time will be spent in this rewarding culinary adventure.
Preparation time
The prep is quick and efficient; you’ll spend about 15 minutes gathering your ingredients and mixing everything together. Pro tip: Get all your ingredients measured out before starting to keep the flow smooth.
Chilling time
After assembling your bars, transfer them to the fridge for a minimum of 1 hour. This chilling step is essential for allowing your no-bake granola bars to set properly, making them enjoyable to slice and munch.
Total time
In total, you’re looking at around 1 hour and 15 minutes before you can indulge in your homemade no-bake granola bars. Just think, in a little over an hour, you’ll have a nutritious snack ready to energize your day!
Nutritional Facts for No-Bake Granola Bars
Understanding the nutritional value of your delicious no-bake granola bars can make your snack decision easier and guilt-free. These bars are not just a tasty treat; they are also packed with essential nutrients that your busy lifestyle craves.
Calories
A single serving of no-bake granola bars typically contains around 150-200 calories, depending on the specific ingredients you choose. This makes them a perfect option for a mid-morning boost or an afternoon pick-me-up.
Protein
When it comes to fueling your body, protein is key. Each bar provides approximately 5-7 grams of protein, depending on the nuts and seeds included. This helps keep you feeling satisfied and energized throughout your day.
Fiber
Packed with fiber, your no-bake granola bars offer about 3-4 grams per serving. This is fantastic for supporting digestive health and keeping you full longer. Enjoying these bars as a part of your daily routine can promote better gut health while satisfying your sweet tooth!
FAQs about No-Bake Granola Bars
Discovering no-bake granola bars is like uncovering a treasure trove of snacking possibilities. They’re versatile, easy to customize, and an absolute game changer for busy professionals. In case you have some questions about these delicious snacks, here are some common queries answered.
Can I make these granola bars without dates?
Sure! While dates provide natural sweetness and moisture, you can replace them with other dried fruits like apricots or raisins for a different flavor. Applesauce serves as another effective substitute, adding moisture without the need for dates. Just adjust the quantity to achieve the consistency you desire, as some fruit pastes may be wetter than dates.
What are some good substitutes for nut butter?
If nut allergies or preferences have you searching for alternatives, you’re in luck! Seed butters like sunflower seed butter or pumpkin seed butter work beautifully in no-bake granola bars. These options still provide that creamy texture and richness. Alternatively, you might try coconut butter for a unique twist. Each substitute will slightly alter the flavor, so feel free to experiment!
How do I store my no-bake granola bars?
To keep your no-bake granola bars fresh, wrap them individually in parchment paper or store them in an airtight container at room temperature for about a week. If you want to extend their shelf life, consider freezing them. Simply cut the bars into portions, wrap them well, and store them in the freezer. When you’re ready for a snack, let them thaw for a bit, and they’ll still taste fantastic!
Conclusion on No-Bake Granola Bars
Crafting your own no-bake granola bars is not just a fun kitchen adventure; it’s a step towards healthier snacking that you can customize to your taste. With a mix of oats, nuts, and your favorite sweeteners, these bars deliver both nutrition and taste without needing an oven. Whether you’re rushing out the door or need a midday pick-me-up, these bars are the perfect companion. Plus, by making them at home, you sidestep added preservatives found in store-bought varieties. So, grab your ingredients and create a batch today—your taste buds and body will thank you!
Print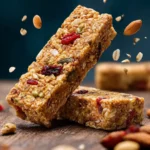
No-Bake Oat Bars
- Total Time: 25 minutes
- Yield: 16 bars 1x
- Diet: Vegan
Description
Delicious and healthy no-bake oat bars made with natural ingredients.
Ingredients
Scale
- 1 cup whole dried dates (pitted)
- ¼ cup maple syrup (or honey)
- 2 tablespoons coconut oil (melted and cooled)
- 3 tablespoons creamy nut butter (all-natural is best)
- ½ teaspoon vanilla extract
- ½ teaspoon sea salt (omit if you are using salted nut butter)
- 2 cups old-fashioned rolled oats
- ½ cup optional add ins (chopped nuts, raisins, mini chocolate chips, dried fruit, sesame seeds, chia seeds, etc.)
Instructions
- Line an 8×8 square baking dish with parchment paper or wax paper.
- If needed, cut the dates in half lengthwise and remove the pit. Unless your dates are incredibly soft, place them in a large heat-safe bowl and cover with hot water. Let soak for 5 to 30 minutes. Drain the dates, reserving the liquid.
- Place the dates into a food-processor fitted with an s-blade. Process until a thick paste forms. Add in ¼ cup maple syrup, 2 tablespoons coconut oil, 3 tablespoons creamy nut butter, ½ teaspoon vanilla extract, and ½ teaspoon sea salt. Pulse until combined and creamy.
- Add in 2 cups old-fashioned rolled oats and pulse until just combined and all the oats are moistened. If needed, add some of the reserved liquid from soaking the dates, 1 tablespoon at a time, until the mixture comes together.
- If desired, add optional add-ins like chocolate chips, chopped nuts, etc. Pulse 1-2 times briefly to incorporate, but not breakdown the additions.
- Transfer the oat mixture into the prepared pan. Using another piece of parchment paper, press the mixture into the pan into an even layer. Place in fridge or freezer for 15 minutes until set up.
- After chilling, use the parchment paper to lift the bars out of the pan. Cut into bars.
- Store the bars in an airtight container, separated by layers of parchment paper, and stored in the fridge.
Notes
- These bars make a great snack or breakfast on-the-go.
- Feel free to customize the optional add-ins to your liking.
- Prep Time: 10 minutes
- Cook Time: 0 minutes
- Category: Snacks
- Method: No-Bake
- Cuisine: American
Nutrition
- Serving Size: 1 bar
- Calories: 150
- Sugar: 8g
- Sodium: 50mg
- Fat: 6g
- Saturated Fat: 2g
- Unsaturated Fat: 4g
- Trans Fat: 0g
- Carbohydrates: 20g
- Fiber: 3g
- Protein: 3g
- Cholesterol: 0mg